Retrieve pedestrian ground truth bones through API
To train autonomous vehicles, it is essential to make sure they recognize not only buildings, roads and cars, but also the pedestrians that occupy the sidewalks and cross the roads, to ensure the safety of all road users. The CARLA simulator provides AI controlled pedestrians to populate your simulation and training data with human forms. There are many computer vision applications in which human pose estimation is an important factor including autonomous driving, but also in security, crowd control and multiple robotic applications.
CARLA's API provides functionality to retrieve the ground truth skeleton from pedestrians in the simulation. The skeleton is composed of a set of bones, each with a root node or vertex and a vector defining the pose (or orientation) of the bone. These bones control the movement of the limbs and body of the simulated pedestrian. By collecting together the ensemble of individual bones, a model of the virtual human's pose can be built that can be used to compare against a pose model estimated by a neural network, or even used to train a neural network for pose estimation.
In this tutorial, we will go through the steps of spawning a pedestrian in a map, setting up an AI controller to move the pedestrian and then retrieving the ground truth skeleton and projecting the bones onto a 2D camera capture.
Setting up the simulator
First, launch the CARLA simulator as per your standard workflow, either in standalone mode or inside the Unreal Editor. We will import several utility libraries to use for maths and plotting. To give us more control over the simulation, we will use synchronous mode in this tutorial. This means that our Python client controls the time progression of the simulator.
import carla
import random
import numpy as np
import math
import queue
import cv2 #OpenCV to manipulate and save the images

# Connect to the client and retrieve the world object
client = carla.Client('localhost', 2000)
world = client.get_world()

# Set up the simulator in synchronous mode
settings = world.get_settings()
settings.synchronous_mode = True # Enables synchronous mode
settings.fixed_delta_seconds = 0.05
world.apply_settings(settings)

# We will aslo set up the spectator so we can see what we do
spectator = world.get_spectator()
Spawning a pedestrian in the CARLA simulator
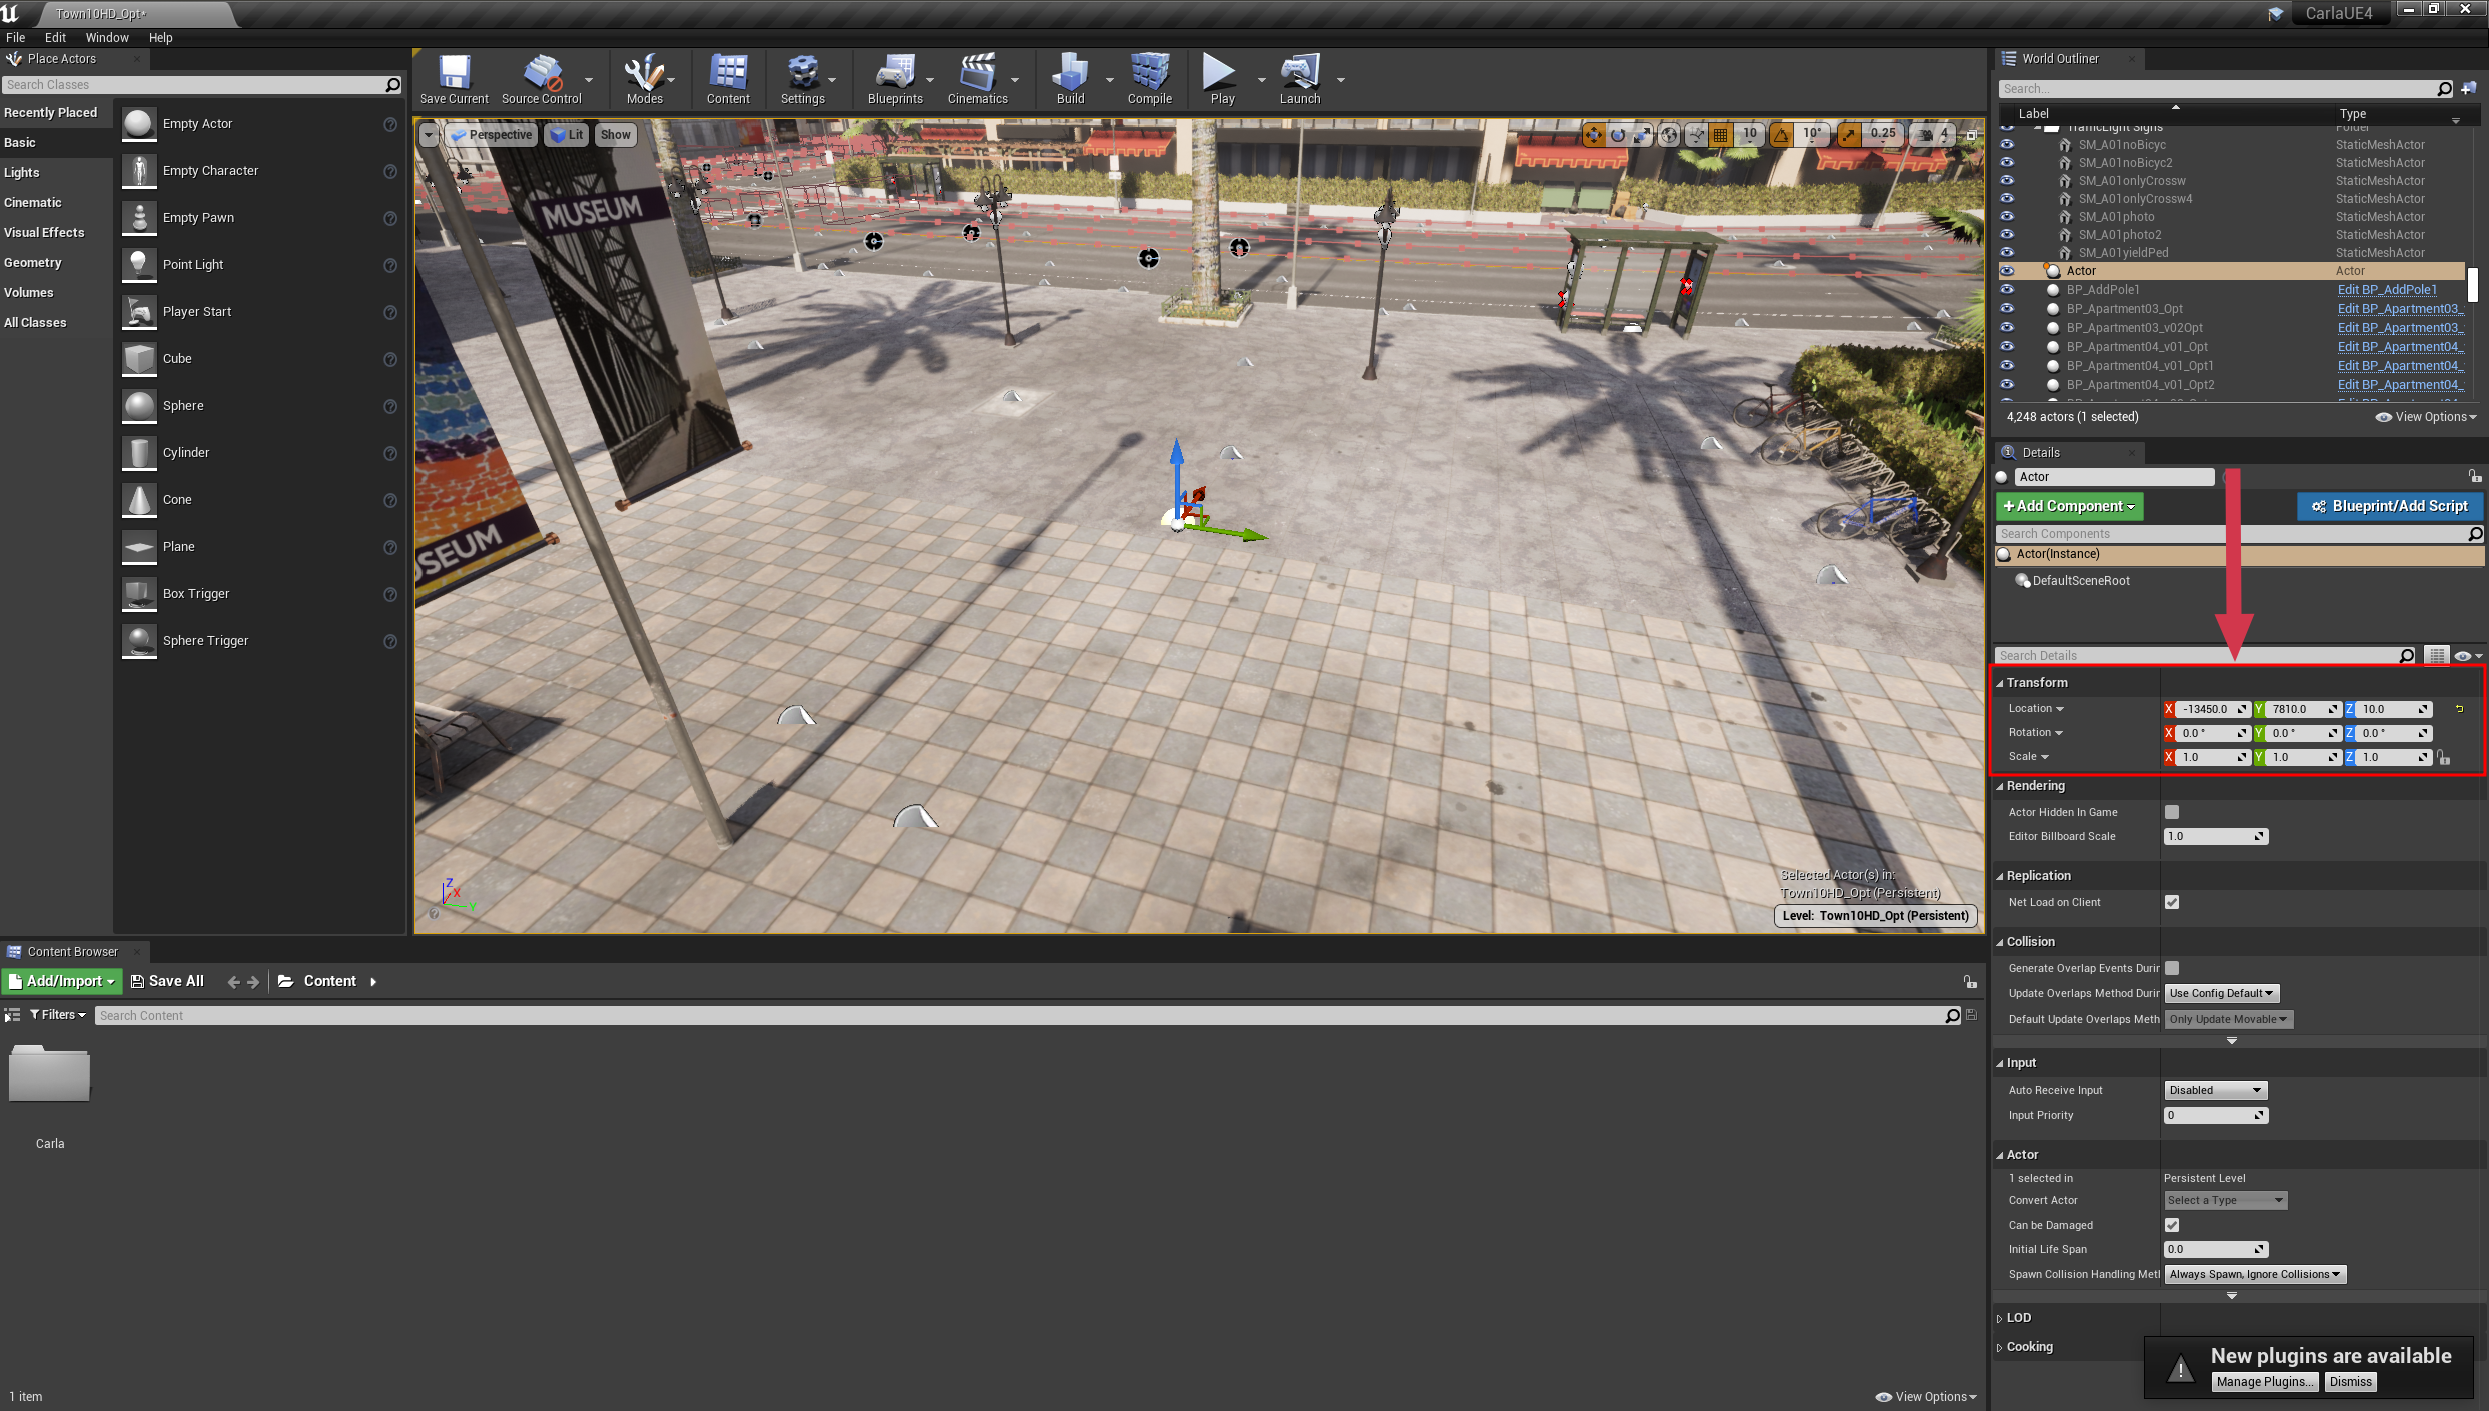
First, we want to spawn a pedestrian in the simulation. This can be done at a random location using world.get_random_location_from_navigation(), or it can be chosen using coordinates gathered from the Unreal Editor. In the unreal editor, add an empty actor to the location where you want to spawn your pedestrian, then use the inspector on the right hand side to query the coordinates.
Note
The Unreal Editor works in units of centimeters, while CARLA works in units of meters so the units must be converted. Ensure to divide the Unreal Editor coordinates by 100 before using in the CARLA simulator.
Once you have chosen your coordinates, you can then spawn the pedestrian. We will also spawn a camera to gather images. We also need a Queue object to allow us easy access to the data from the camera (as the camera sensor operates on its own thread, separate from the main Python thread running your script).
In order to see our pedestrian, we need to transform the camera so it is pointing at the pedestrian we spawn. For this we will use a function that calculates the translation and rotation needed to center the camera:
def center_camera(ped, rot_offset=0):
    # Rotate the camera to face the pedestrian and apply an offset
    trans = ped.get_transform()
    offset_radians = 2 * math.pi * rot_offset/360
    x = math.cos(offset_radians) * -2
    y = math.sin(offset_radians) * 2
    trans.location.x += x
    trans.location.y += y
    trans.location.z = 2
    trans.rotation.pitch = -16
    trans.rotation.roll = 0
    trans.rotation.yaw = -rot_offset
    spectator.set_transform(trans)
    return trans
Now we'll spawn the pedestrian, the camera, a controller and move the spectator so we can see what we've done:
# Get the pedestrian blueprint and spawn it
pedestrian_bp = random.choice(world.get_blueprint_library().filter('*walker.pedestrian*'))
transform = carla.Transform(carla.Location(x=-134,y=78.1,z=1.18))
pedestrian = world.try_spawn_actor(pedestrian_bp, transform)

# Spawn an RGB camera
camera_bp = world.get_blueprint_library().find('sensor.camera.rgb')
camera = world.spawn_actor(camera_bp, transform)

# Create a queue to store and retrieve the sensor data
image_queue = queue.Queue()
camera.listen(image_queue.put)

world.tick()
image_queue.get()
# We must call image_queue.get() each time we call world.tick() to
# ensure the timestep and sensor data stay synchronised

# Now we will rotate the camera to face the pedestrian
camera.set_transform(center_camera(pedestrian))
# Move the spectator to see the result
spectator.set_transform(camera.get_transform())

# Set up the AI controller for the pedestrian.... see below
controller_bp = world.get_blueprint_library().find('controller.ai.walker')
controller = world.spawn_actor(controller_bp, pedestrian.get_transform(), pedestrian)

# Start the controller and give it a random location to move to
controller.start()
controller.go_to_location(world.get_random_location_from_navigation())

# Move the world a few frames to let the pedestrian spawn
for frame in range(0,5):
    world.tick()
    trash = image_queue.get()
AI controller to guide the pedestrian around the map
In the previous step we also initialized an AI controller to help the pedestrian move intelligently around the map with the following code (you don't need to repeat it):
controller_bp = world.get_blueprint_library().find('controller.ai.walker')
controller = world.spawn_actor(controller_bp, pedestrian.get_transform(), pedestrian)
controller.start()
controller.go_to_location(world.get_random_location_from_navigation())
Now the pedestrian will move autonomously with each time increment (world.tick()) of the simulation.
Camera geometry
Now we need to perform some geometric calculations. First, we want to transform the world coordinates of the bones into camera coordinates, we do this using the inverse of the camera transform. This means that the coordinates are transformed to be relative to a camera located at the origin facing in the positive x-direction.
# get 4x4 matrix to transform points from world to camera coordinates
world_2_camera = np.array(camera.get_transform().get_inverse_matrix())
Then, we need to project the 3D points onto the 2D field of view (FOV) of the camera to overlay them on the output images using the camera matrix or projection matrix. The following function produces the camera matrix needed for this 3D -> 2D transformation.
def build_projection_matrix(w, h, fov):
    focal = w / (2.0 * np.tan(fov * np.pi / 360.0))
    K = np.identity(3)
    K[0, 0] = K[1, 1] = focal
    K[0, 2] = w / 2.0
    K[1, 2] = h / 2.0
    return K
Build the skeleton
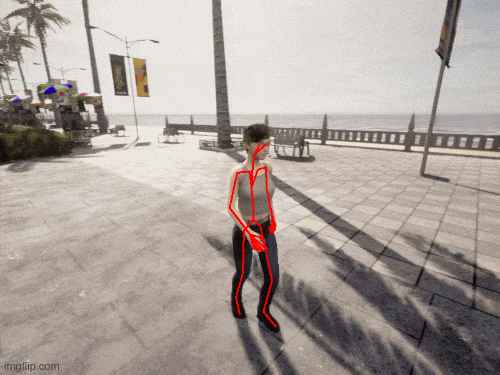
Now we can put the moving parts together. First, gather the bone coordinates from the simulation using pedestrian.get_bones() and then put together the skeleton and project it onto the 2D imaging plane of the camera sensor. The bones are joined into the complete skeleton using the pairs defined in skeleton.txt that can be downloaded here.
We need a function to iterate through the bone pairs defined in skeleton.txt and join the bone coordinates into lines that can be overlayed onto a camera sensor image.
def get_image_point(bone_trans):
        # Calculate 2D projection of bone coordinate

        # get the world location of the bone root
        loc = bone_trans.world.location
        bone = np.array([loc.x, loc.y, loc.z, 1])
        # transform to camera coordinates
        point_camera = np.dot(world_2_camera, bone)

        # New we must change from UE4's coordinate system to an "standard"
        # (x, y ,z) -> (y, -z, x)
        # and we remove the fourth component also
        point_camera = [point_camera[1], -point_camera[2], point_camera[0]]

        # now project 3D->2D using the camera matrix
        point_img = np.dot(K, point_camera)
        # normalize
        point_img[0] /= point_img[2]
        point_img[1] /= point_img[2]

        return point_img[0:2]

def build_skeleton(ped, sk_links, K):

    ######## get the pedestrian skeleton #########
    bones = ped.get_bones()

    # list where we will store the lines we will project
    # onto the camera output
    lines = []

    # cycle through the bone pairs in skeleton.txt and retrieve the joint positions
    for link in sk_links[1:]:

        # get the roots of the two bones to be joined
        bone_transform_1 = next(filter(lambda b: b.name == link[0], bones.bone_transforms), None)
        bone_transform_2 = next(filter(lambda b: b.name == link[1], bones.bone_transforms), None)

        # some bone names aren't matched
        if bone_transform_1 is not None and bone_transform_2 is not None:

            # Calculate 2D projection of 3D bone coordinates
            point_image = get_image_point(bone_transform_1)

            # append line start to lines list
            lines.append([point_image[0], point_image[1], 0, 0])

            # Calculate 2D projection of 3D bone coordinates
            point_image = get_image_point(bone_transform_2)

            # append line end to lines list
            lines[-1][2] = point_image[0]
            lines[-1][3] = point_image[1]

    return lines
Next, let's read the bone pairs from skeleton.txt:
skeleton_links = []
with open('skeleton.txt') as f:
    while True:
        line = f.readline()
        if not line:
            break
        stripped = list(map(str.strip, line.strip().split(',')))
        skeleton_links.append(stripped)


world.tick()
trash = image_queue.get()
Now we can iterate a few frames, building the skeleton in each frame and projecting the skeleton onto the camera sensor output. We use OpenCV to draw the skeleton onto the sensor output and save the image:
Note
Ensure that you have created a folder named out/ in your working directory to store the images
for frame in range(0,360):

    # Move the camera around the pedestrian
    camera.set_transform(center_camera(pedestrian, frame + 200))

    # Advance the frame and retrieve an image
    world.tick()
    # Retrieve the frame from the queue
    image = image_queue.get()

    # get 4x4 matrix to transform points from world to camera coordinates
    world_2_camera = np.array(camera.get_transform().get_inverse_matrix())

    # get some attributes from the camera
    image_w = camera_bp.get_attribute("image_size_x").as_int()
    image_h = camera_bp.get_attribute("image_size_y").as_int()
    fov = camera_bp.get_attribute("fov").as_float()

    # calculate the camera matrix to project from 3D -> 2D
    K = build_projection_matrix(image_w, image_h, fov)

    # Build the list of lines that will display the skeleton
    lines = build_skeleton(pedestrian, skeleton_links, K)

    # Reshape the data into a 2D RBGA array
    img = np.reshape(np.copy(image.raw_data), (image.height, image.width, 4))

    # Draw the lines into the image using OpenCV
    for line in lines:
        l = [int(x) for x in line]
        cv2.line(img, (l[0],l[1]), (l[2],l[3]), (255,0,0, 255), 2)

    # Save the image
    cv2.imwrite('out/skeleton%04d.png' % frame, img)
In the out/ folder you should now have a sequence of frames with the skeleton overlayed over the camera sensor output. The following animation can be reconstructed by joining the frames into a video:
Summary
During this tutorial, you have learned how to spawn a pedestrian with an AI controller, recover the ground truth 3D coordinates of the pedestrian bones and project those bones onto the 2D image captured by the camera sensor. You could use the techniques learned in this tutorial to set up training and validation for human pose estimation frameworks using the CARLA simulator.