Customizing maps: Traffic Lights and Signs
This guide explains how to add traffic lights and signs to your custom map, configure the area of influence of each one, and how to configure traffic lights as a group at junctions. This option is only available to users who have access to the Unreal Engine editor.
Traffic lights
To add traffic lights to your new map:
1. From the Content Browser, navigate to Content/Carla/Static/TrafficLight/StreetLights_01. You will find several different traffic light blueprints to choose from.
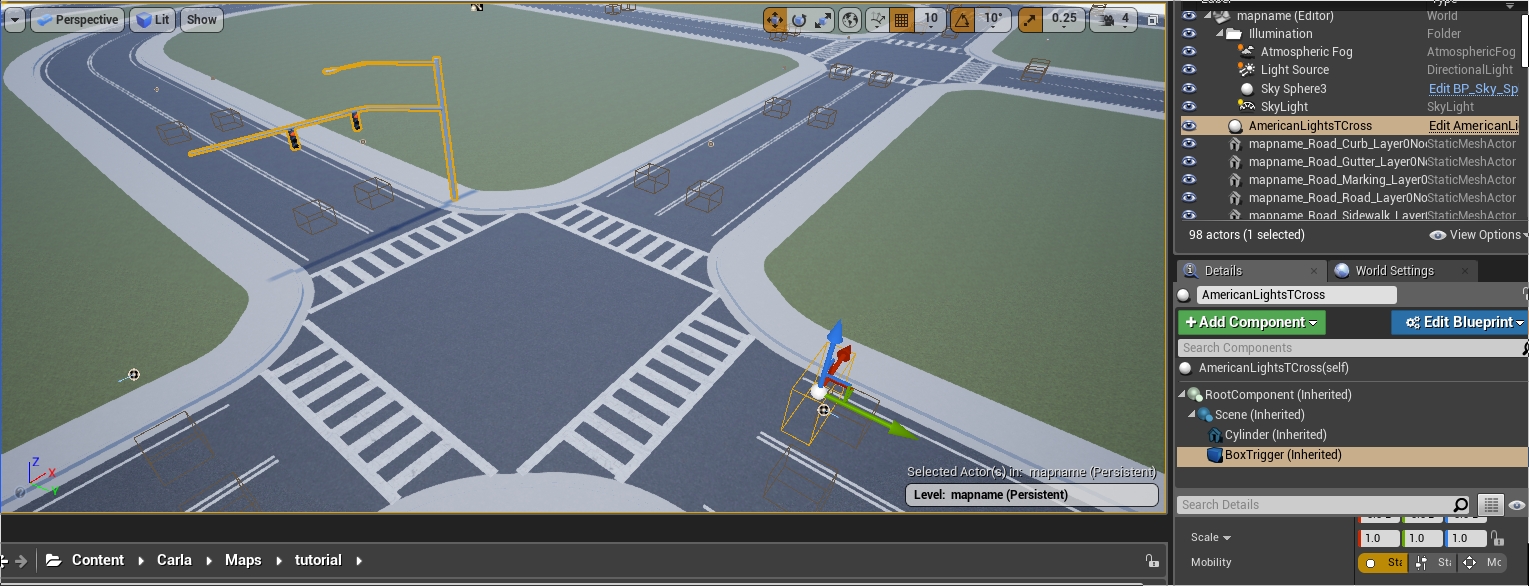
2. Drag the traffic lights into the scene and position them in the desired location. Press the space bar on your keyboard to toggle between positioning, rotation, and scaling tools.
3. Adjust the trigger volume for each traffic light by selecting the BoxTrigger component in the Details panel and adjusting the values in the Transform section. This will determine the traffic light's area of influence.
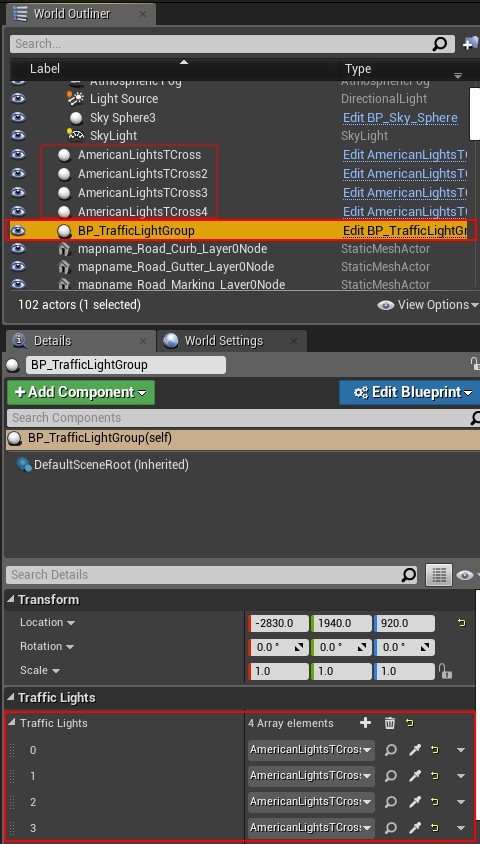
4. For junctions, drag the BP_TrafficLightGroup actor into the level. Assign all the traffic lights in the junction to the traffic light group by adding them to the Traffic Lights array in the Details panel.
5. Traffic light timing is only configurable through the Python API. See the documentation here for more information.
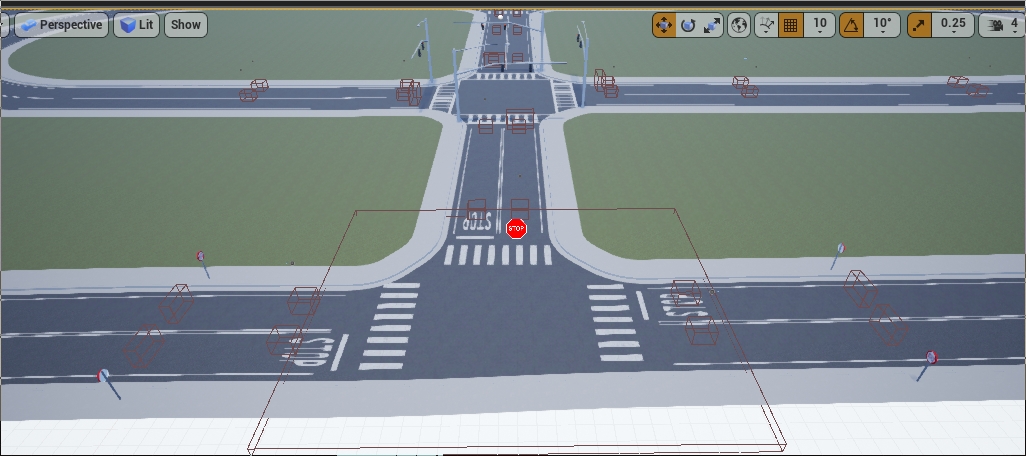
Example: Traffic Signs, Traffic lights and Turn based stop.
Traffic signs
To add traffic lights to your new map:
1. From the Content Browser, navigate to Content/Carla/Static/TrafficSign. You will find several different traffic light blueprints to choose from.
2. Drag the traffic lights into the scene and position them in the desired location. Press the space bar on your keyboard to toggle between positioning, rotation, and scaling tools.
3. Adjust the trigger volume for each traffic sign by selecting the BoxTrigger component in the Details panel and adjusting the values in the Transform section. This will determine the traffic light's area of influence. Not all traffic signs have a trigger volume. Those that do, include the yield, stop and speed limit signs.
Next steps
Continue customizing your map using the tools and guides below:
- Implement sub-levels in your map.
- Add buildings with the procedural building tool.
- Customize the road with the road painter tool.
- Customize the weather
- Customize the landscape with serial meshes.
Once you have finished with the customization, you can generate the pedestrian navigation information.
If you have any questions about the process then you can ask in the forum.