Map customization tools
There are several tools provided by the CARLA team that allow users to edit maps at will from the Unreal Editor. This tutorial introduces the most relevant tools, according to their purpose.
Important
This tutorial only applies to users that work with a build from source, and have access to the Unreal Editor.
Add serial meshes
There is a series of blueprints in Carla/Blueprints/LevelDesign that are useful to add props aligned in one direction. All of them use a series of meshes, and a Bezier curve that establishes the path where the props are placed.
There are differences between them, that make them fit specific purposes. However, the all work the same way. Only the parametrization presents differences.
- Initialize the series. The blueprints need a Static Mesh that will be repeated. Initially, only one element will appear, standing on the starting point of a Bezier curve with two nodes, beginning and ending.
- Define the path. Press Alt over one of the nodes, to create a new one and modify the curve. A new mesh will appear on every node of the curve, and the space between nodes will be filled with elements separated by a distance measure. Adjust the curve using the weights on every node.
- Customize the pattern. This is where the blueprints present differences between each other.
Warning
New props will probably interfere with the mesh navigation. If necessary, rebuild that as explained here after doing these changes.
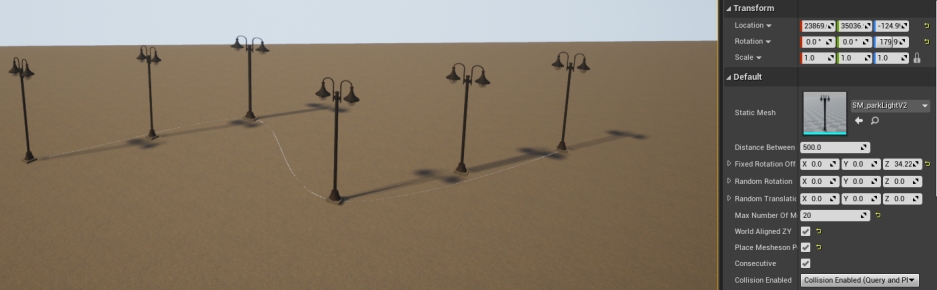
BP_RepSpline
The blueprint BP_RepSpline adds individual elements along the path defined by a Bezier curve. There are some specificic parameters that change the serialization.
- Distance between — Set the distance between elements.
- Offset rotation — Set a fixed rotation for the different axis.
- Random rotation — Set a range of random rotations for the different axis.
- Offset translation — Set a range of random locations along the different axis.
- Max Number of Meshes — Set the maximum amount of elements that will be place between nodes of the curve.
- World aligned ZY — If selected, the elements will be vertically aligned regarding the world axis.
- EndPoint — If selected, an element will be added in the ending node of the curve.
- Collision enabled — Set the type of collisions enabled for the meshes.
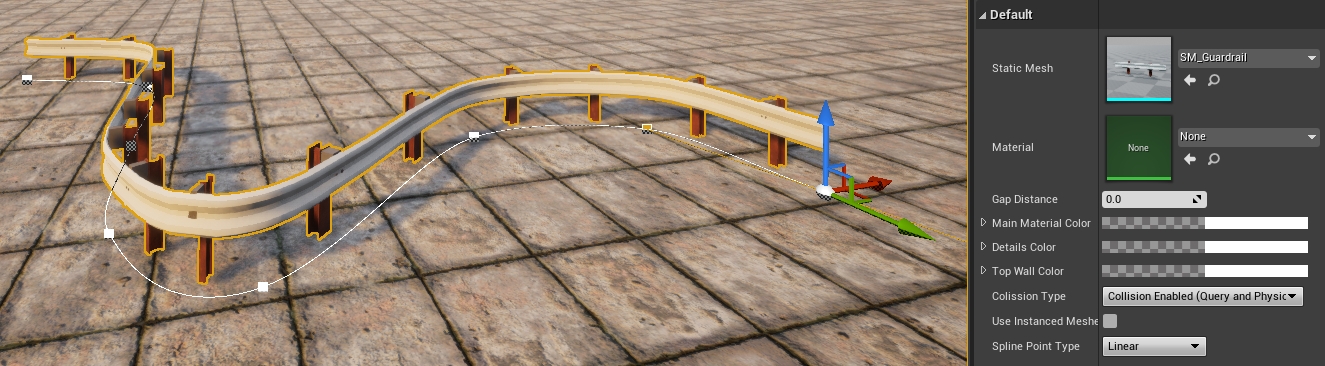
BP_Spline
The blueprint BP_Spline adds connected elements strictly following the path defined by a Bezier curve. The mesh will be warped to fit the path created.
- Gap distance — Add a separation between elements.
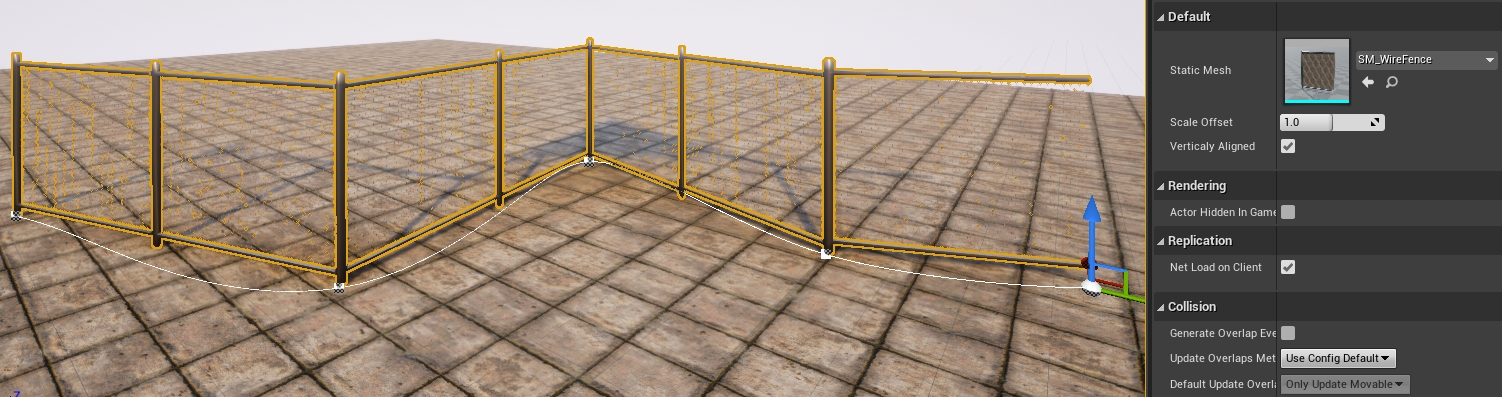
BP_Wall
The blueprint BP_Wall adds connected elements along the path defined by a Bezier curve. The mesh will not be warped to fit the curve, but the nodes will be respected.
- Distance between — Set the distance between elements.
- Vertically aligned — If selected, the elements will be vertically aligned regarding the world axis.
- Scale offset — Scale the length of the mesh to round out the connection between elements.
BP_SplinePowerLine
The blueprint BP_SplinePowerLine adds electricity poles along the path defined by a Bezier curve, and connects them with power lines.
This blueprint can be found in Carla/Static/Pole. This blueprint allows to set an array of meshes to repeat, to provide variety.
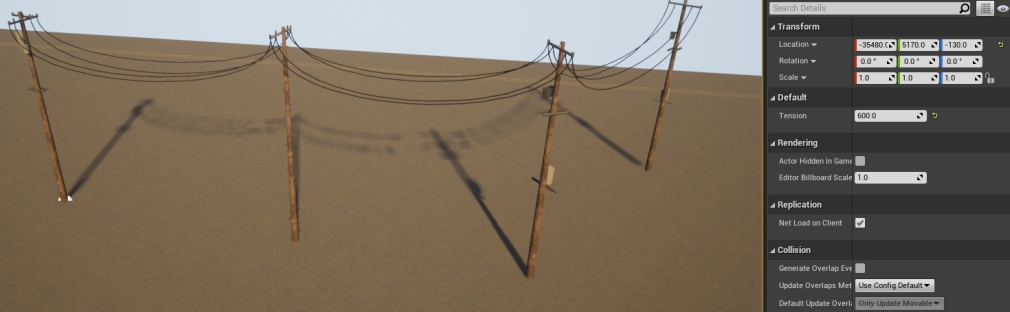
The power line that connects the pole meshes can be customized.
- Choose the mesh that will be used as wire.
- Edit the tension value. If
0, the power lines will be staight. The bigger the value, the looser the connection. - Set the sockets. Sockets are empty meshes that represent the connection points of the power line. A wire is created form socket to socket between poles. The amount of sockets can be changed inside the pole meshes.
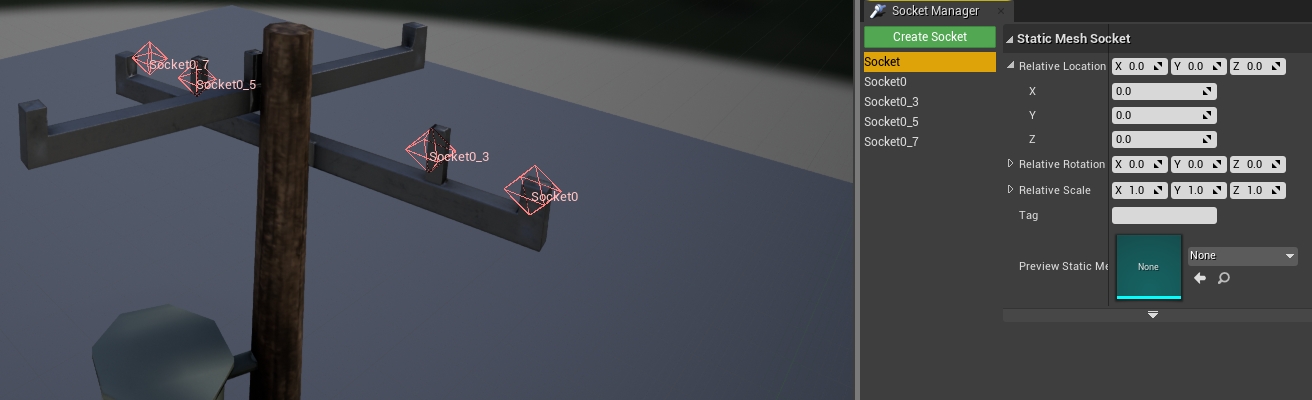
Important
The amount of sockets and their names should be consistent between poles. Otherwise, visualization issues may arise.
Procedural buildings
The blueprint BP_Procedural_Building in Content/Carla/Blueprints/LevelDesign creates a realistic building using key meshes that are repeated along the structure. For each of them, the user can provide an array of meshes that will be used at random for variety. The meshes are only created once, and the repetitions will be instances of the same to save up costs.
Note
Blueprints can be used instead of meshes, to allow more variety and customization for the building. Blueprints can use behaviour trees to set illumination inside the building, change the materials used, and much more.
Building structure
The key meshes will be updated everytime a change is made, and the building will disappear. Enable Create automatically or click on Create Building to see the new result.
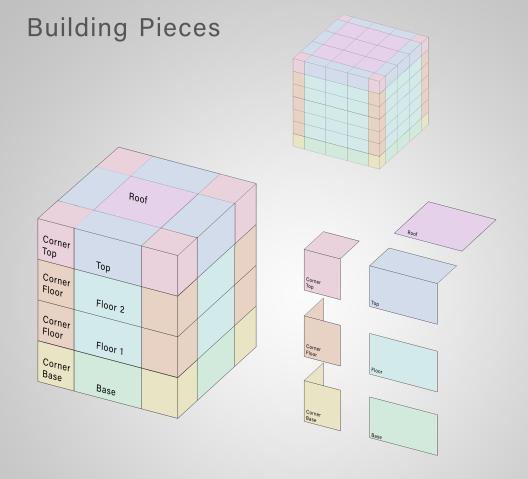
These key meshes can be percieved as pieces of the building's structure. They can be grouped in four categories.
- Base — The ground floor of the building.
- Body — The middle floors of the building.
- Top — The highest floor of the building.
- Roof — Additional mesh that used to fill the spaces in the middle of the top floor.
For each of them, except the Roof, there is a mesh to fill the center of the floor, and a Corner mesh that will be placed on the sides of the floor. The following picture represents the global structure.
The Base parameters set the dimensions of the building.
- Num Floors — Floors of the building. Repetitions of the Body meshes.
- Length X and Length Y — Area of the building. Repetitions of the central meshes for each side of the building.

Structure modifications
There are some additional options to modify the general structure of the building.
- Disable corners — If selected, no corner meshes will be used.
- Use full blocks — If selected, the structure of the building will use only one mesh per floor. No corners nor repetitions will appear in each floor.
- Doors — Meshes that appear in the ground floor, right in front of the central meshes. The amount of dloors and their location can be set.
0is the initial position,1the next base repetition, and so on. - Walls — Meshes that substitute one or more sides of the building. For example, a plane mesh can be used to paint one side of the building.
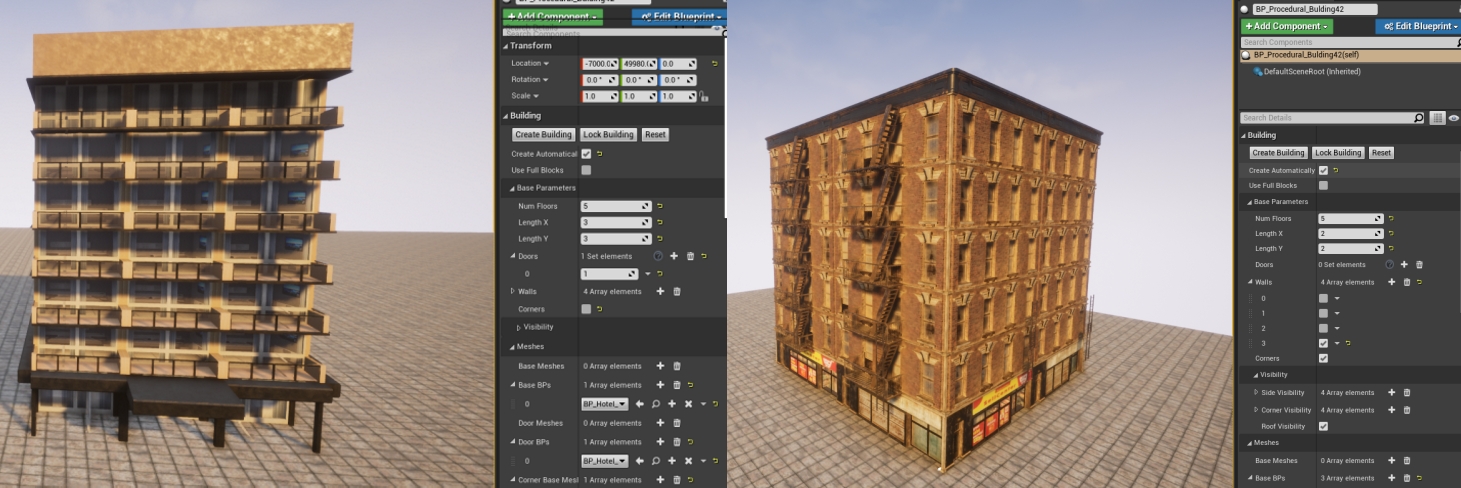
On the right, a building with a wall applied to one side of the building. The wall is a texture with no fire escape.
Weather customization
The weather can be easily customized by the users in CARLA using the PythonAPI. However, there is some configuration that users can do in order to set the default weather for a map. The weather parameters available for configuration by the following blueprints, are the same accessible from the API. These are described here.
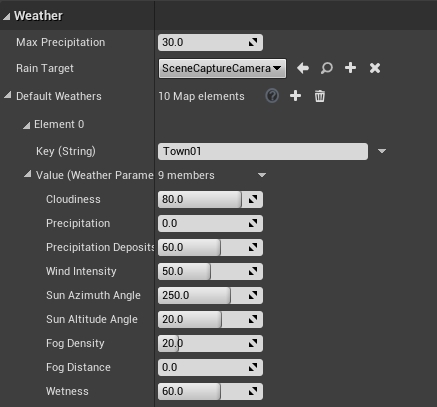
BP_Weather
This blueprint is loaded into the world when the simulation starts. It contains the default weather parameters for every map, and these can be modified at will.
1. Open the BP_Weather in Content/Carla/Blueprints/Weather.
2. Go to the Weather group in the blueprint.
3. Choose the desired town and modify the parameters.
BP_Sky
This blueprint groups all the weather parameters. It can be loaded into the scene when there is no CARLA server running, and used to ea test different configurations before setting a new default weather.
1. Find the BP_Sky in Content/Carla/Blueprints/Weather.
2. Load the blueprint in the scene. Drag it into the scene view.
3. Edit the weather parameters. The weather in the scene will be updated accordingly.
Important
If more than one blueprint is loaded into the scene, the weather will be duplicated with weird results, such as having two suns.
That is all there is so far, regarding the different map customization tools available in CARLA.
Open CARLA and mess around for a while. If there are any doubts, feel free to post these in the forum.