Benchmarking your Agent
In this tutorial we show:
Introduction
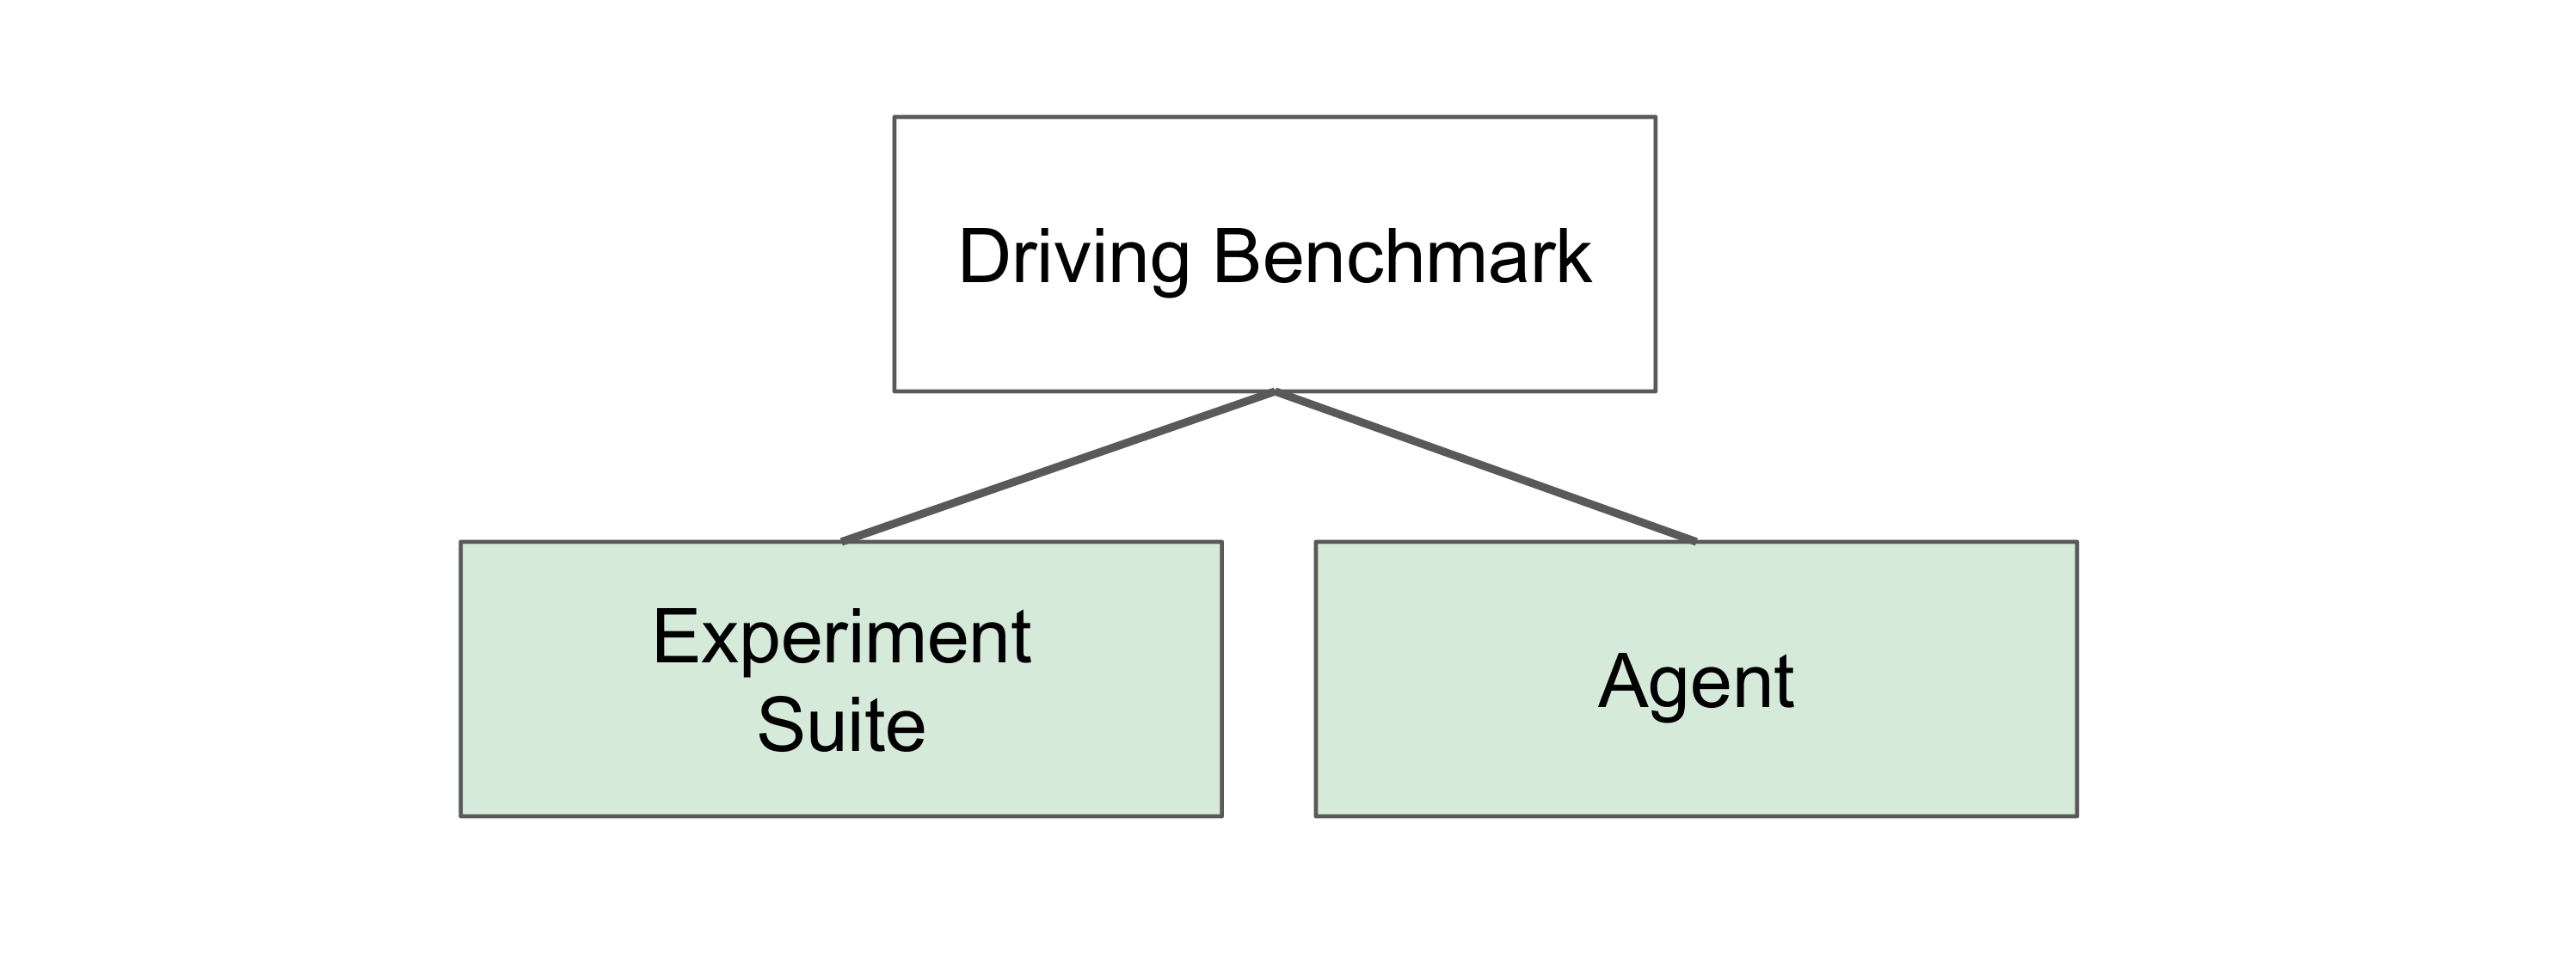
The driving benchmark is associated with other two modules. The agent module, that is a controller which performs in another module: the experiment suite. Both modules are abstract classes that must be redefined by the user.
The following code excerpt is an example of how to apply a driving benchmark;
# We instantiate a forward agent, a simple policy that just set
# acceleration as 0.9 and steering as zero
agent = ForwardAgent()

# We instantiate an experiment suite. Basically a set of experiments
# that are going to be evaluated on this benchmark.
experiment_suite = BasicExperimentSuite(city_name)

# Now actually run the driving_benchmark
# Besides the agent and experiment suite we should send
# the city name ( Town01, Town02) the log
run_driving_benchmark(agent, experiment_suite, city_name,
                      log_name, continue_experiment,
                      host, port)
Following this excerpt, there are two classes to be defined. The ForwardAgent() and the BasicExperimentSuite(). After that, the benchmark can ne run with the "run_driving_benchmark" function. The summary of the execution, the performance metrics, are stored in a json file and printed to the screen.
Defining the Agent
The tested agent must inherit the base Agent class. Let's start by deriving a simple forward agent:
from carla.agent.agent import Agent
from carla.client import VehicleControl

class ForwardAgent(Agent):
To have its performance evaluated, the ForwardAgent derived class must redefine the run_step function as it is done in the following excerpt:
def run_step(self, measurements, sensor_data, directions, target):
    """
    Function to run a control step in the CARLA vehicle.
    """
    control = VehicleControl()
    control.throttle = 0.9
    return control
This function receives the following parameters:
- Measurements: the entire state of the world received by the client from the CARLA Simulator. These measurements contains agent position, orientation, dynamic objects information, etc.
- Sensor Data: The measured data from defined sensors, such as Lidars or RGB cameras.
- Directions: Information from the high level planner. Currently the planner sends a high level command from the follwoing set: STRAIGHT, RIGHT, LEFT, NOTHING.
- Target Position: The position and orientation of the target.
With all this information, the run_step function is expected to return a vehicle control message, containing: steering value, throttle value, brake value, etc.
Defining the Experiment Suite
To create a Experiment Suite class you need to perform the following steps:
- Create your custom class by inheriting the ExperimentSuite base class.
- Define the test and train weather conditions to be used.
- Build the Experiment objects .
Definition
The defined set of experiments must derive the ExperimentSuite class as in the following code excerpt:
from carla.agent_benchmark.experiment import Experiment
from carla.sensor import Camera
from carla.settings import CarlaSettings

from .experiment_suite import ExperimentSuite


class BasicExperimentSuite(ExperimentSuite):
Define test and train weather conditions
The user must select the weathers to be used. One should select the set of test weathers and the set of train weathers. This is defined as a class property as in the following example:
@property
def train_weathers(self):
    return [1]
@property
def test_weathers(self):
    return [1]
Building Experiments
The experiments are composed by a task that is defined by a set of poses. Let's start by selecting poses for one of the cities, let's take Town01, for instance. First of all, we need to see all the possible positions, for that, with a CARLA simulator running in a terminal, run:
python view_start_positions.py
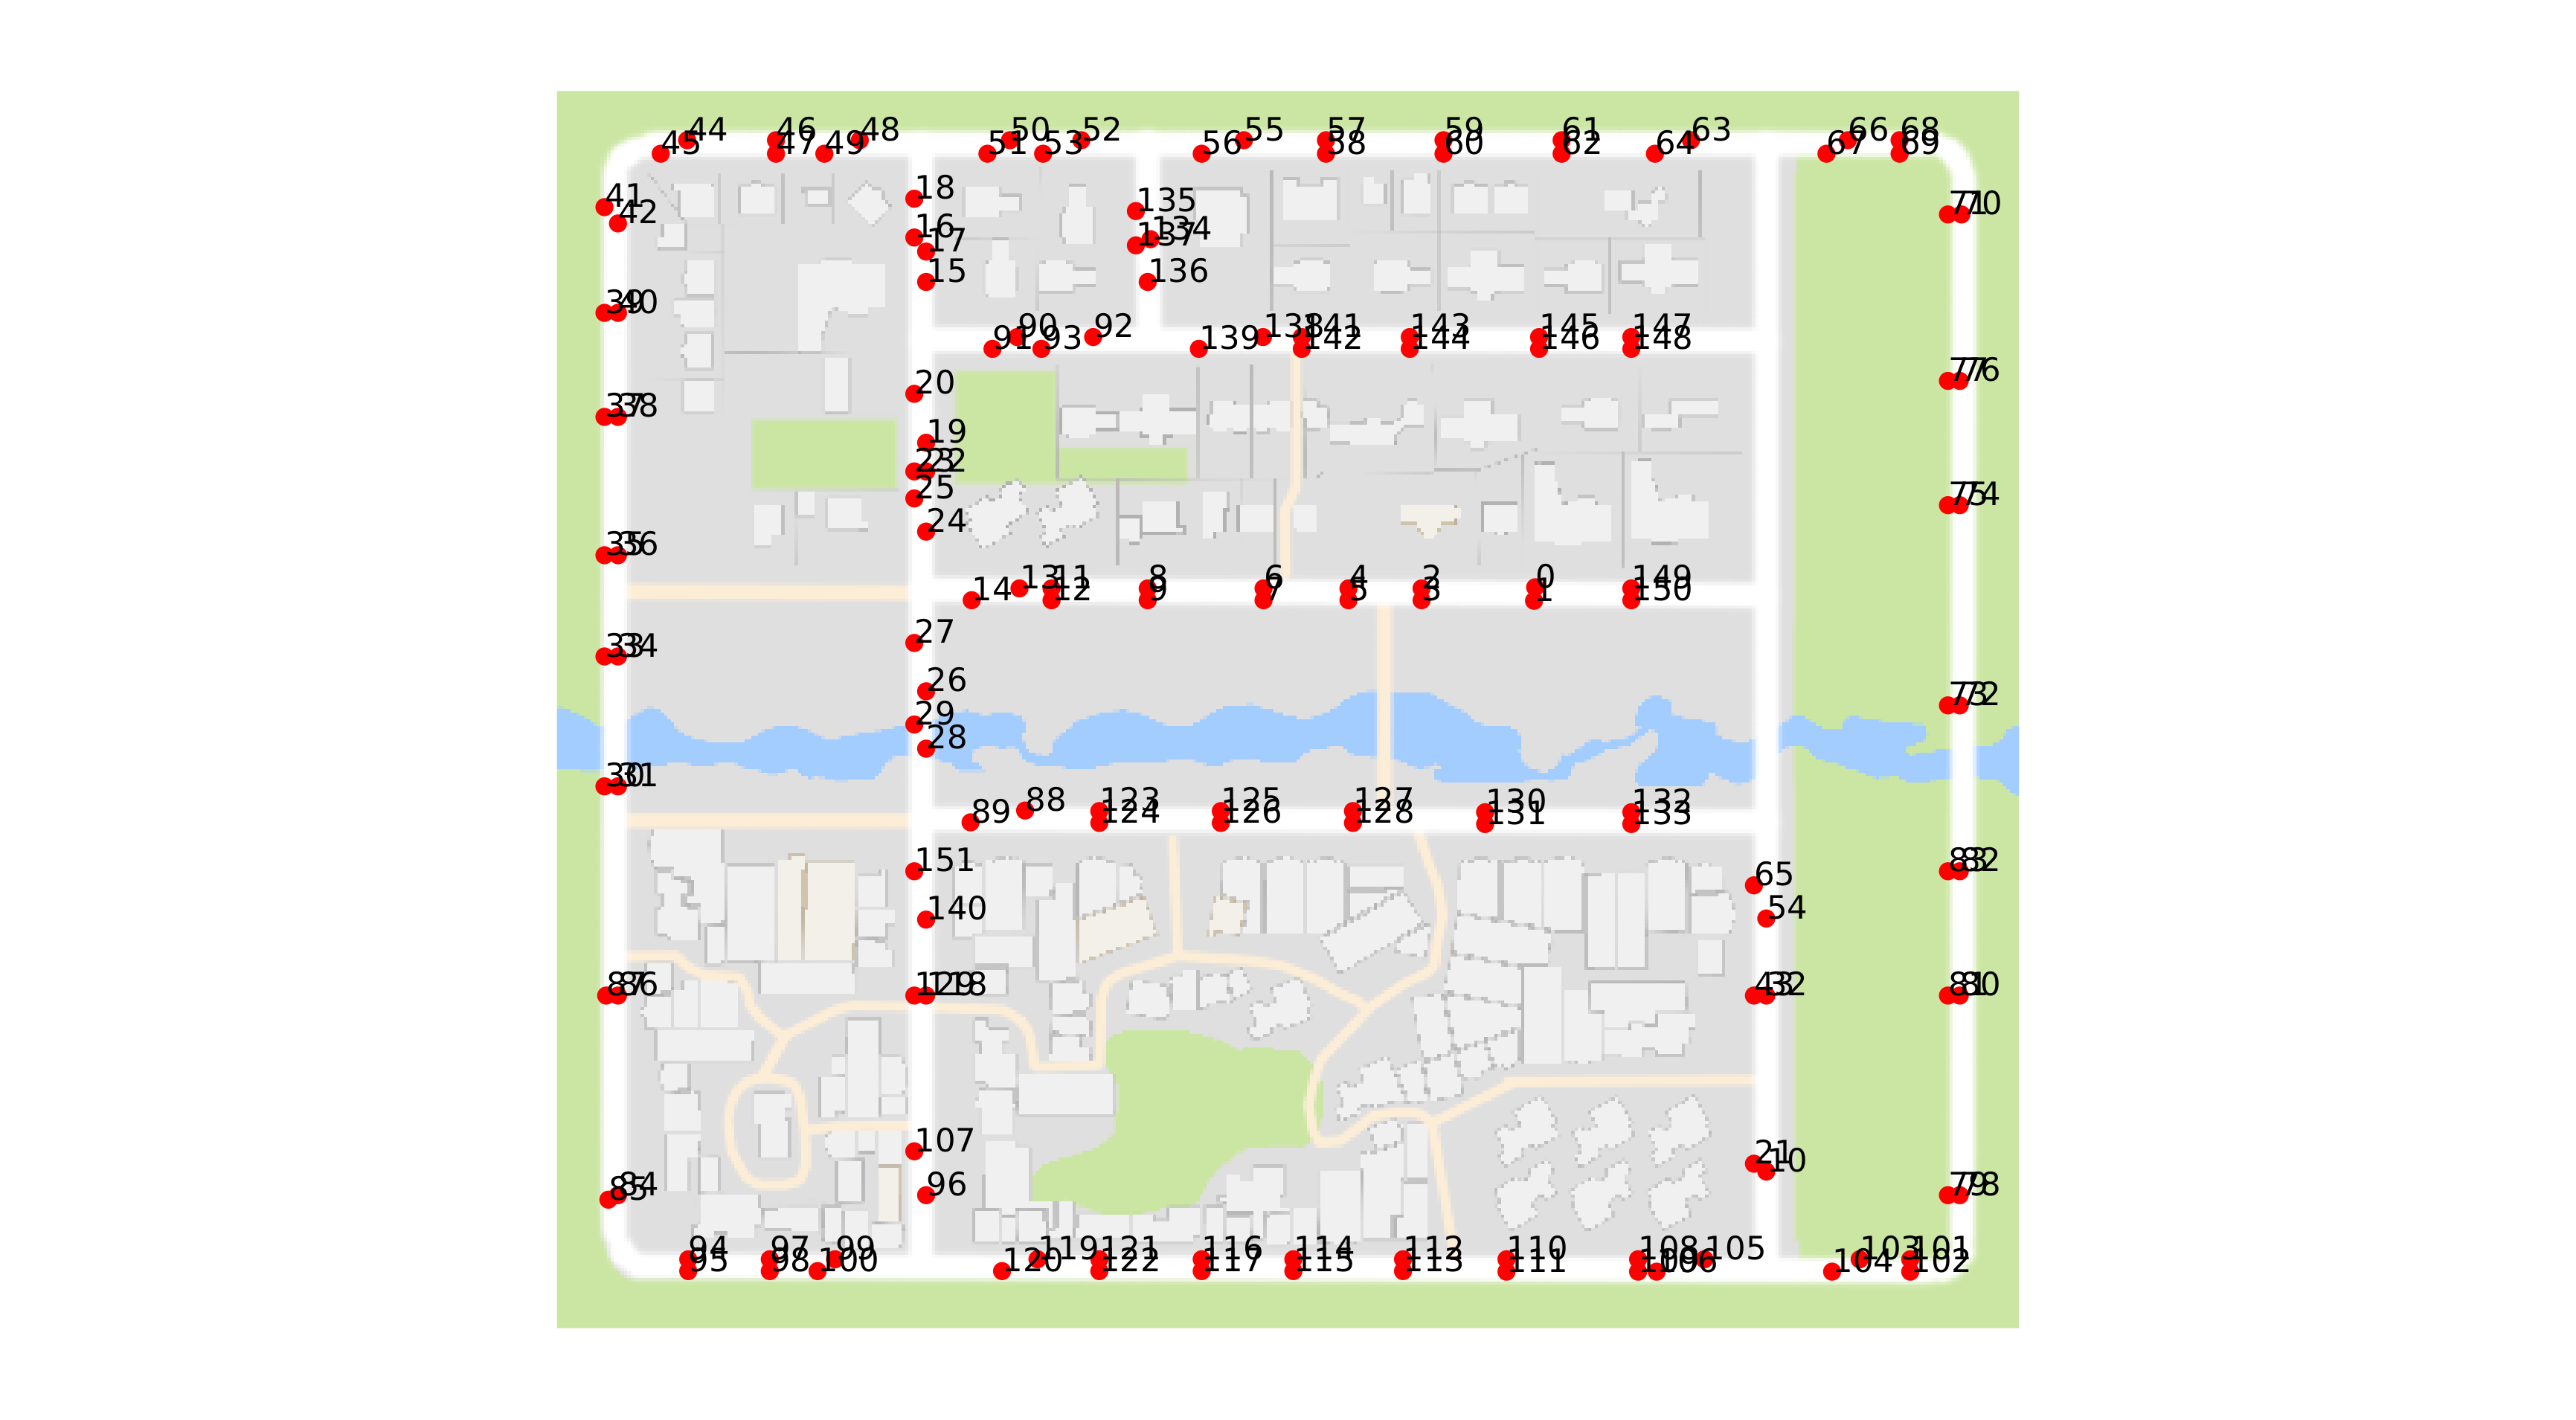
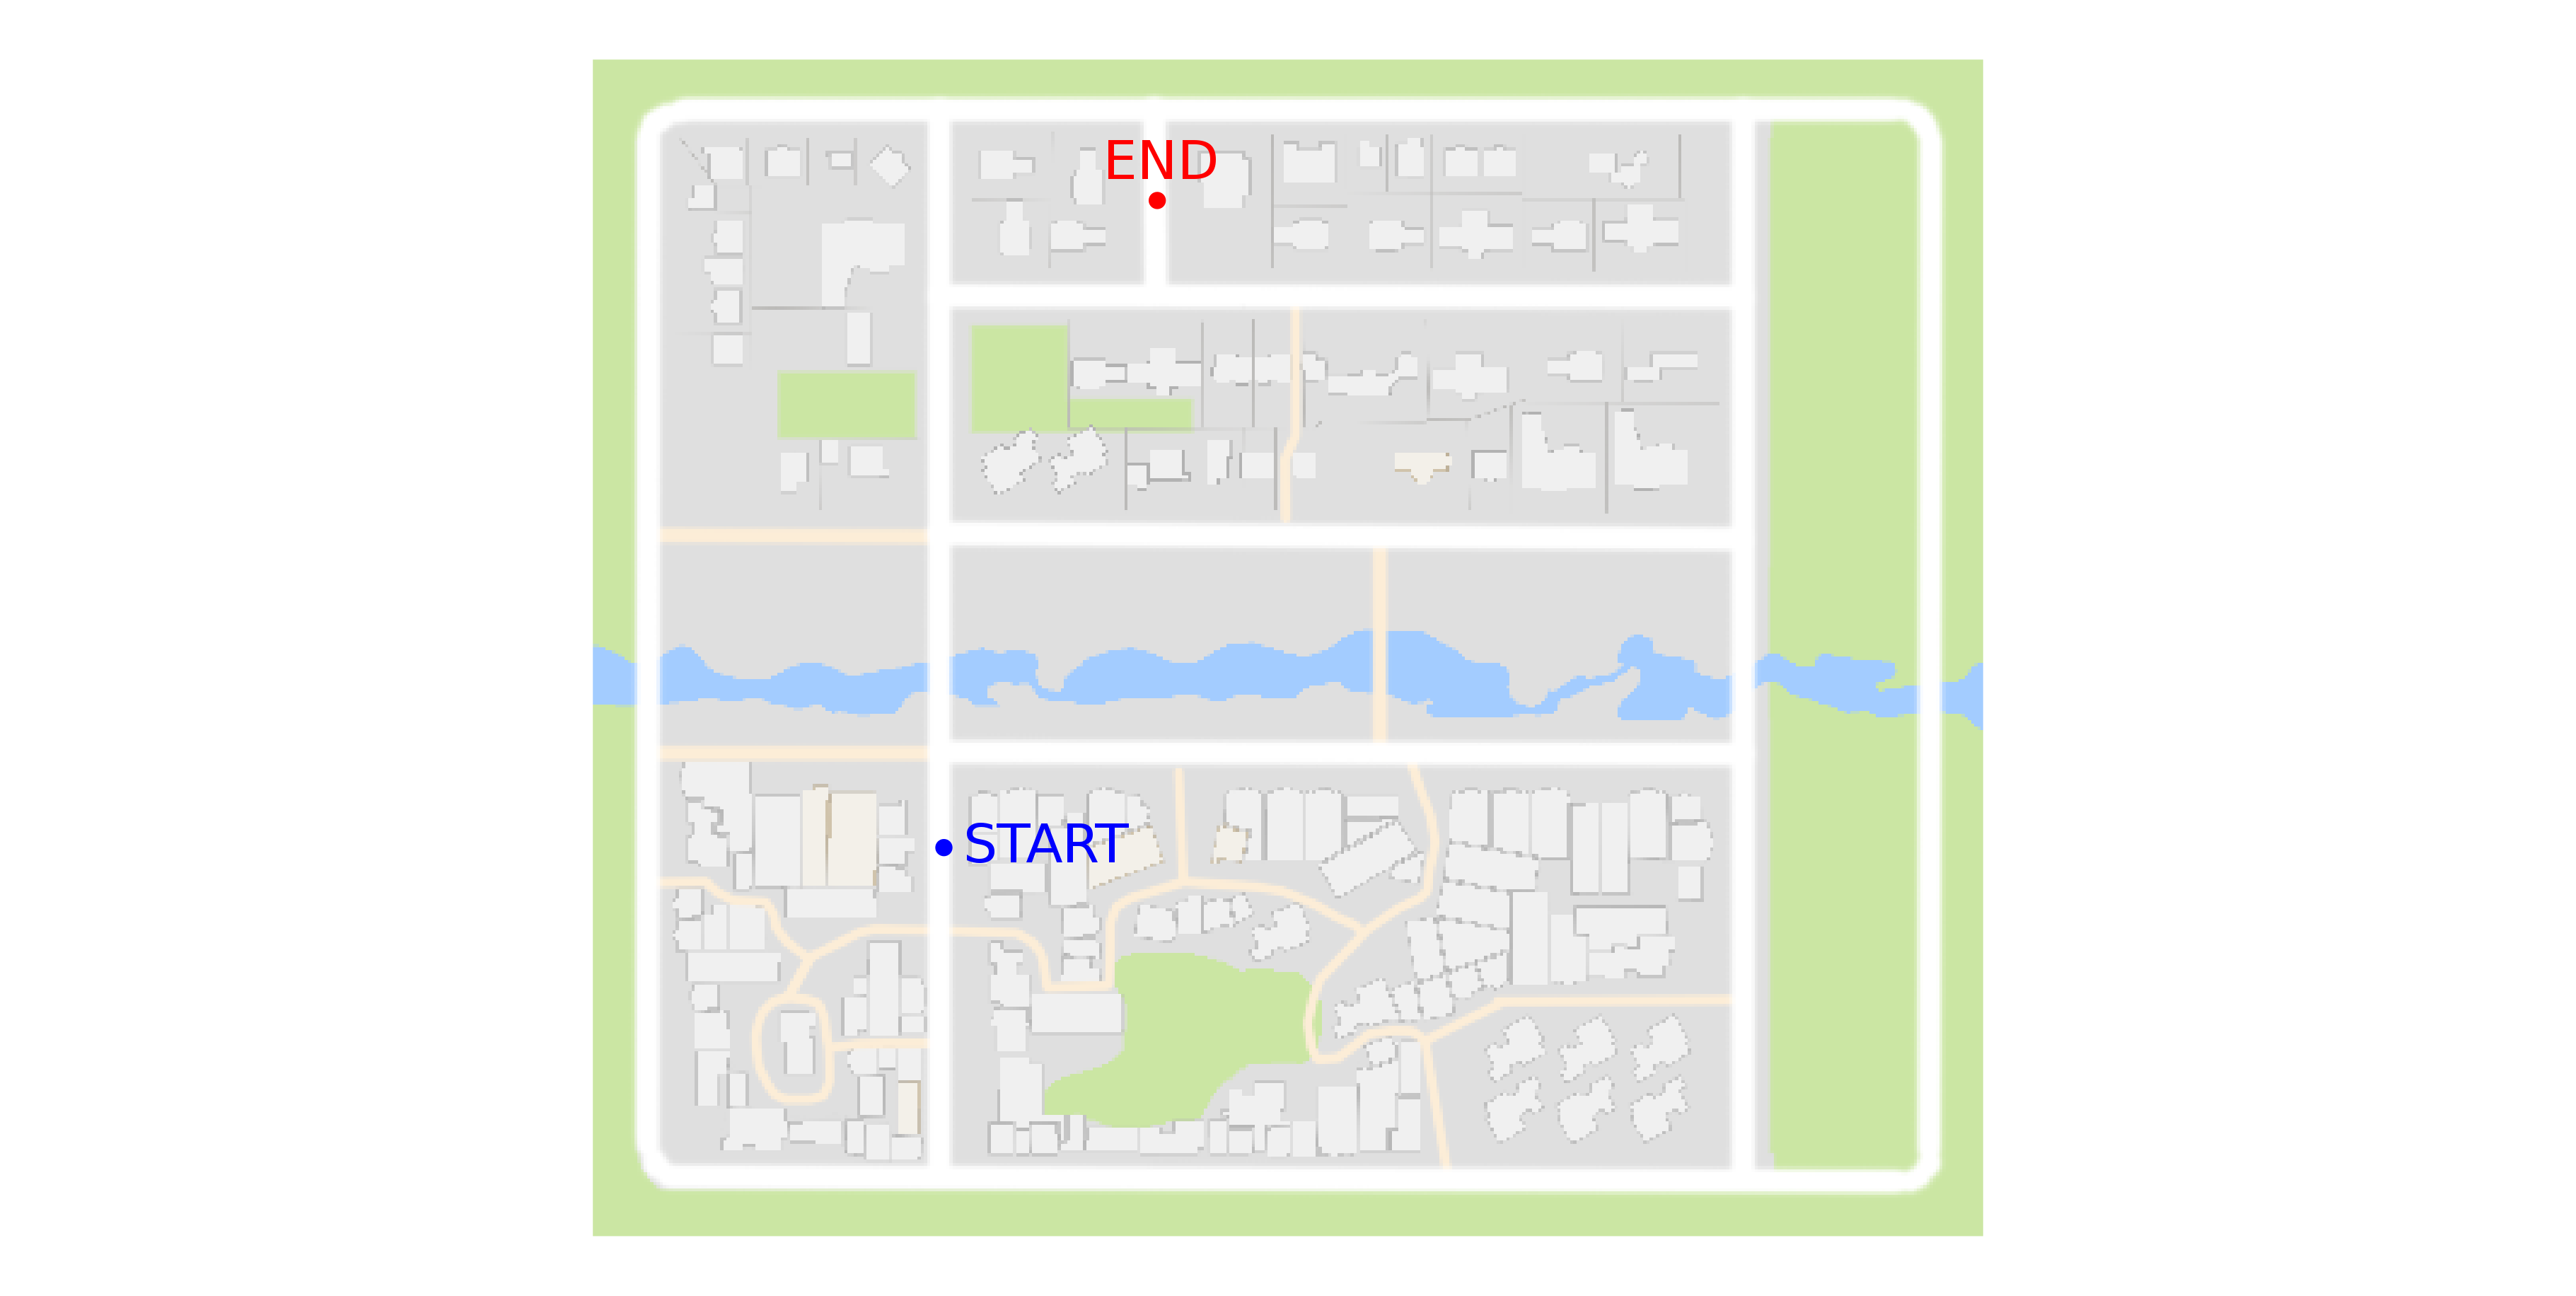
Now let's choose, for instance, 140 as start position and 134 as the end position. This two positions can be visualized by running:
python view_start_positions.py --pos 140,134 --no-labels
Let's choose two more poses, one for going straight, other one for one simple turn. Also, let's also choose three poses for Town02:
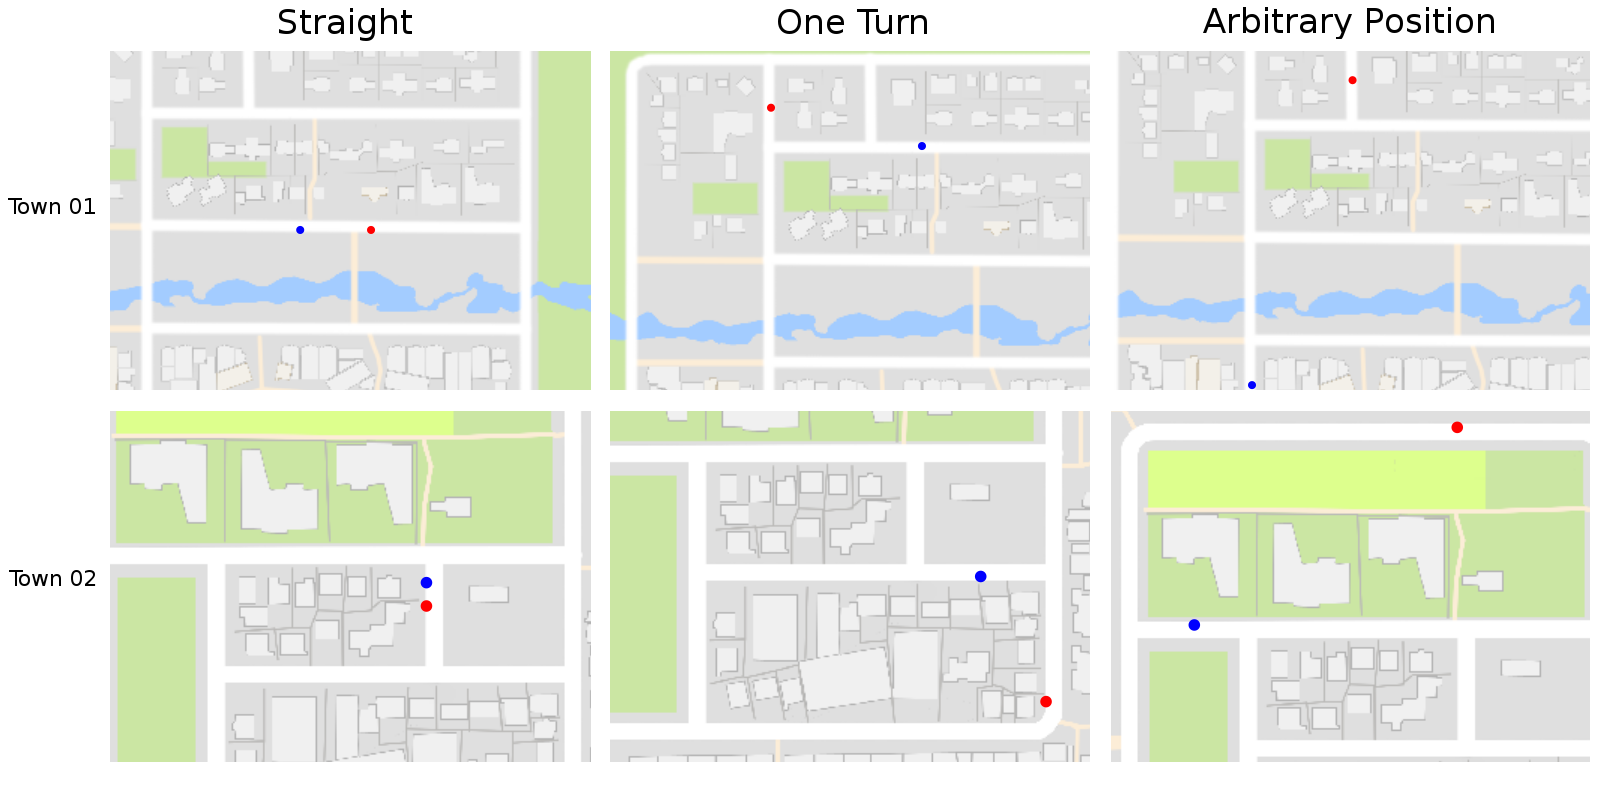
Figure: The poses used on this basic Experiment Suite example. Poses are a tuple of start and end position of a goal-directed episode. Start positions are shown in Blue, end positions in Red. Left: Straight poses, where the goal is just straight away from the start position. Middle: One turn episode, where the goal is one turn away from the start point. Right: arbitrary position, the goal is far away from the start position, usually more than one turn.
We define each of these poses as a task. Plus, we also set the number of dynamic objects for each of these tasks and repeat the arbitrary position task to have it also defined with dynamic objects. In the following code excerpt we show the final defined positions and the number of dynamic objects for each task:
# Define the start/end position below as tasks
poses_task0 = [[7, 3]]
poses_task1 = [[138, 17]]
poses_task2 = [[140, 134]]
poses_task3 = [[140, 134]]
# Concatenate all the tasks
poses_tasks = [poses_task0, poses_task1 , poses_task1 , poses_task3]
# Add dynamic objects to tasks
vehicles_tasks = [0, 0, 0, 20]
pedestrians_tasks = [0, 0, 0, 50]
Finally by using the defined tasks we can build the experiments vector as we show in the following code excerpt:
experiments_vector = []
    # The used weathers is the union between test and train weathers
    for weather in used_weathers:
        for iteration in range(len(poses_tasks)):
            poses = poses_tasks[iteration]
            vehicles = vehicles_tasks[iteration]
            pedestrians = pedestrians_tasks[iteration]

            conditions = CarlaSettings()
            conditions.set(
                SendNonPlayerAgentsInfo=True,
                NumberOfVehicles=vehicles,
                NumberOfPedestrians=pedestrians,
                WeatherId=weather

            )
            # Add all the cameras that were set for this experiments
            conditions.add_sensor(camera)
            experiment = Experiment()
            experiment.set(
                Conditions=conditions,
                Poses=poses,
                Task=iteration,
                Repetitions=1
            )
            experiments_vector.append(experiment)
The full code could be found at basic_experiment_suite.py
Expected Results
First you need a CARLA Simulator running with fixed time-step , so the results you will obtain will be more or less reproducible. For that you should run the CARLA simulator as:
./CarlaUE4.sh /Game/Maps/<Town_name> -windowed -world-port=2000 -benchmark -fps=10
The example presented in this tutorial can be executed for Town01 as:
./driving_benchmark_example.py -c Town01
You should expect these results: town01_basic_forward_results
For Town02:
./driving_benchmark_example.py -c Town02
You should expect these results: town01_basic_forward_results